For users who prefer a graphical interface to hie-storage, Filezilla is a commonly used tool. Once installed, users can access and interact with hie-storage using a windows-like environment as opposed to the command-line interface. Instructions for how to install Filezilla and set it up to access hie-storage are outlined below.
Installation
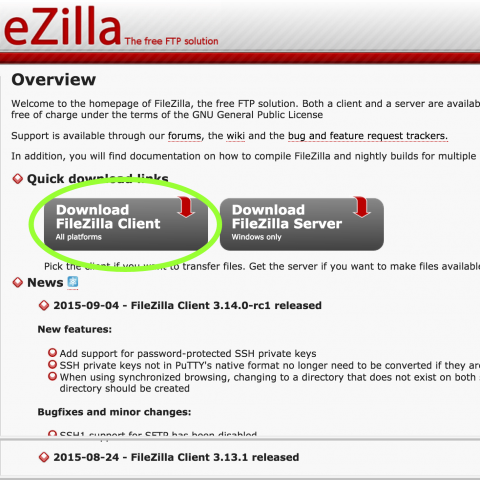
- Visit the Filezilla homepage at https://filezilla-project.org/
- On the homepage, click on the ‘Download Filezilla Client’ link
- On the following page, click the ‘Download Now’ button (which should already be set for your particular OS)
- Once the Filezilla installer has been downloaded to your local machine, open it to begin the Filezilla installation
- Step through the installation screens to install the most recent version of Filezilla
- **Note – Remember to deselect installation of any additional software that you do not require
Setup
- Open Filezilla
- An overview of the different panels you can expect to find on Filezilla are outlined on the image below
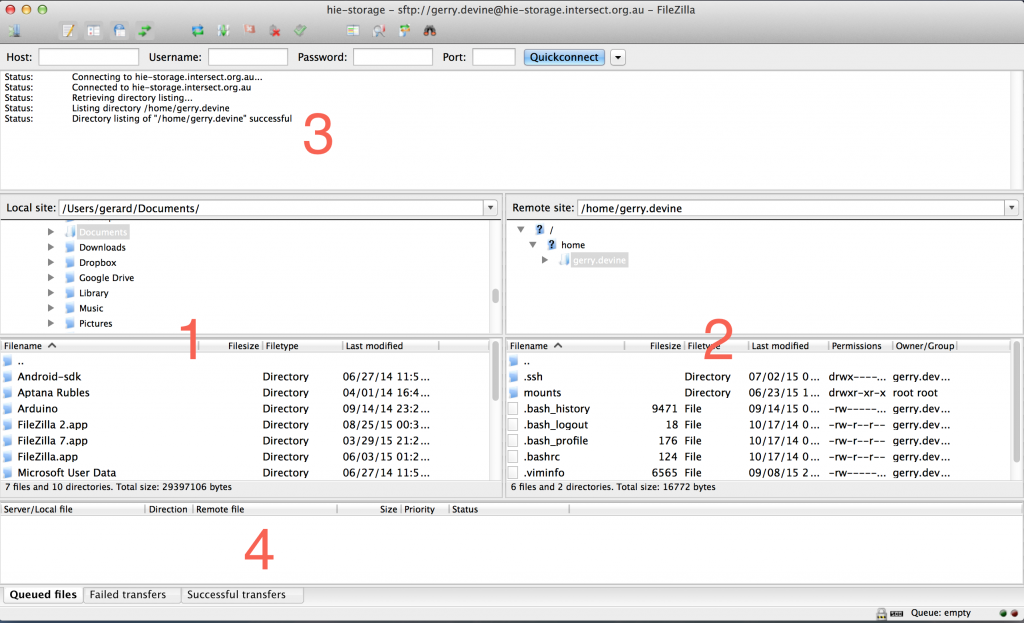 Local file explorer (folder structure above, files below)
- Remote file explorer
- Status of any current connections/commands
- List of (i)files in queue awaiting transfer, (ii) any failed tranfers, (iii) successfully completed transfers
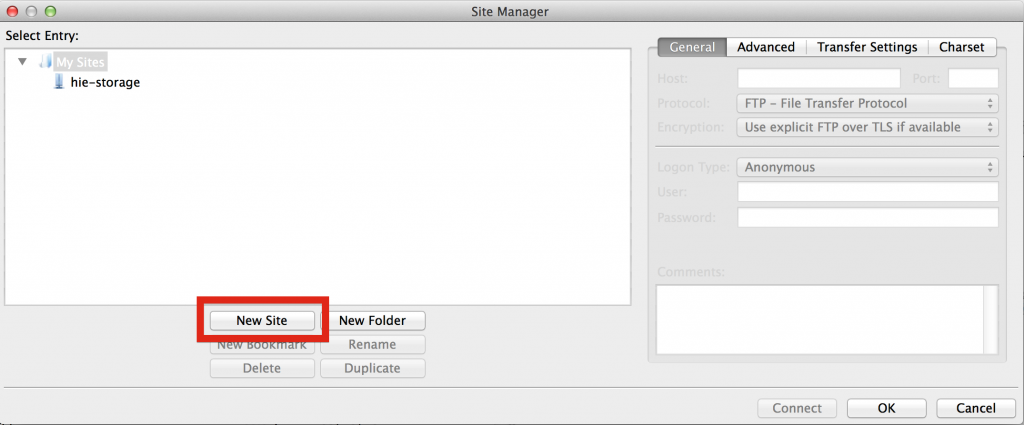
- To add and save a remote connection (e.g. to HIE-Storage), begin by selecting ‘Site Manager’ from the ‘File’ option on the top menu.
- The ‘Site Manager’ panel should now open up.
- Click the ‘New Site’ button and name the new site ‘hie-storage’
- With the new ‘hie-storage’ site selected in the left panel, fill out the following details in the ‘General’ tab on the right panel
- Host > hie-storage.intersect.org.au
- Port (optional) > 22
- Protocol > SFTP – SSH File Transfer Protocol
- Logon Type > Normal
- User > “Your hie-storage user name”
- Password > “Your hie-storage password”
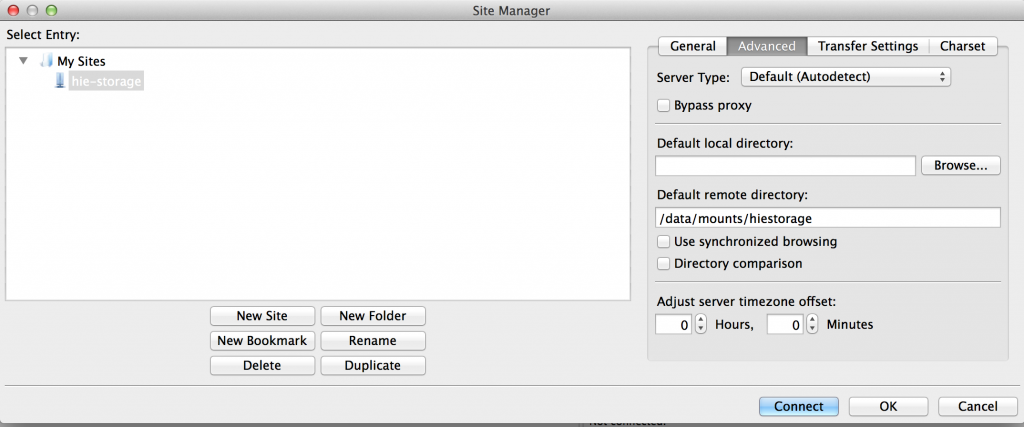
- On the ‘Advanced’ tab, fill out the entry entitled ‘Default remote directory’ with /data/mounts/hiestorage/ (this is so you are automatically navigated to the top level of the hie-storage folder hierarchy)
- Click ‘Connect’
- (On first connect, a dialog box will appear confirming you would like to connect. You may tick the radio box to stop this form happening in the future)
- You should now see the top level folders of hie-storage, i.e. ‘Common’, ‘Lab’ and ‘WorkingData’ on the right hand panel (with the status on the top panel showing that you are now connected to hie-storage).
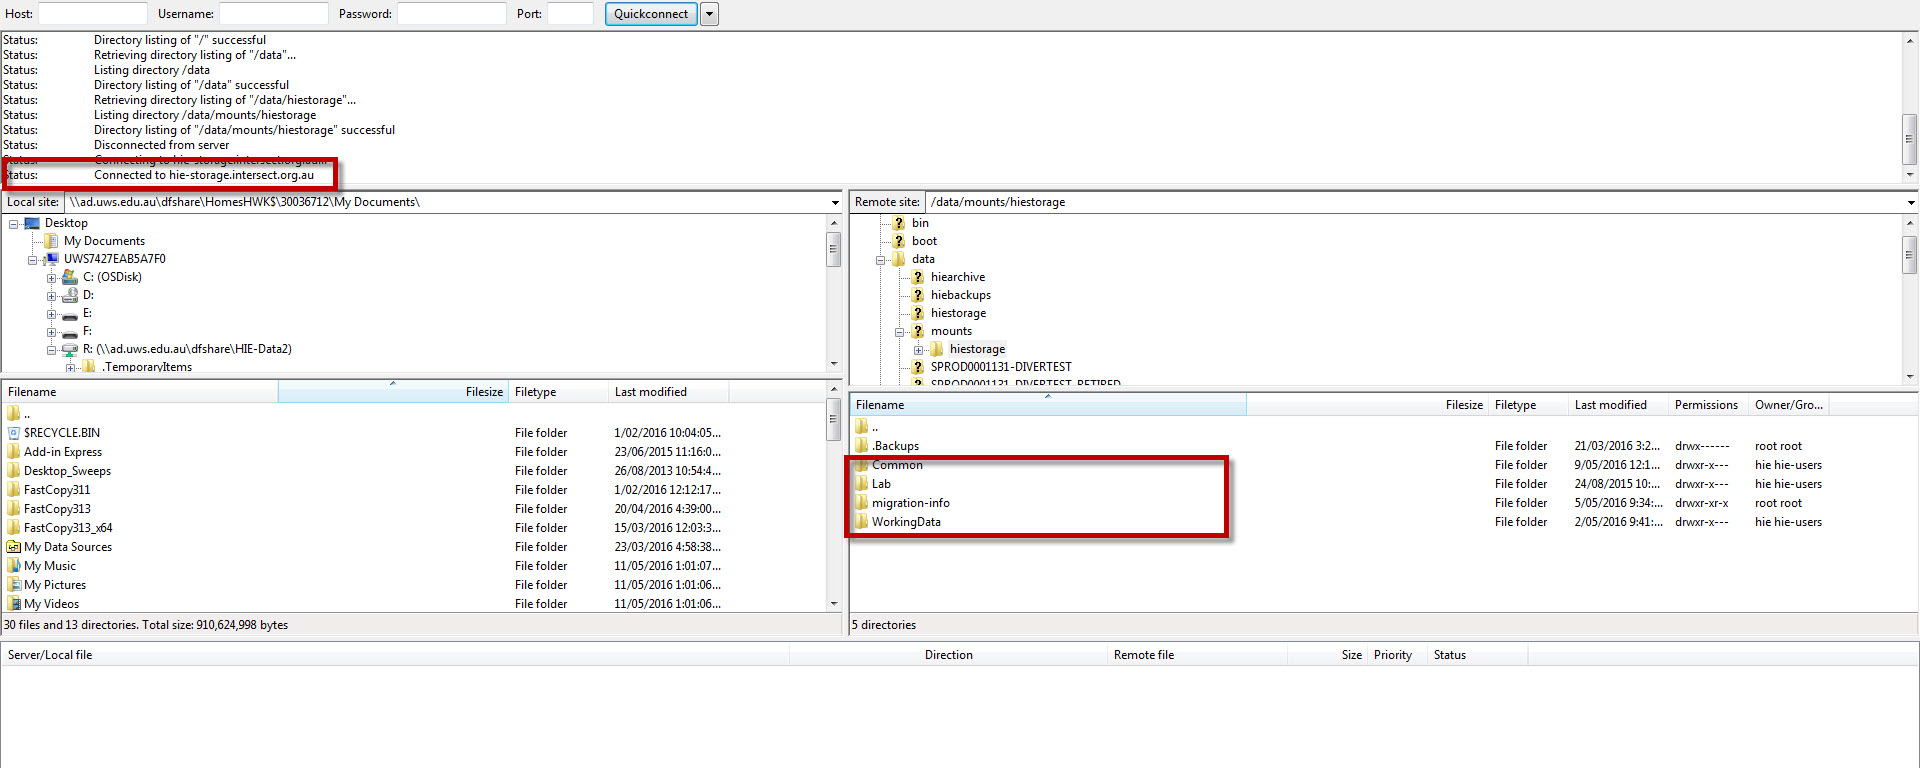
- Navigate through hie-storage (e.g. by clicking on WorkingData on the right panel) until you find the directory into which, or from which, you would like to copy a file.
- Also navigate to the folder on your local file system (in the lift hand panel) from where you would like to copy from/to.
- To copy a file or folder simply drag that file or folder from left panel to right (or vice versa). You can watch the status of the transfer on the bottom panel.
- When complete, close the connection to hie-storage by clicking the disconnect button on the top panel menu (red x, see image below). To reopen a connection, click the ‘open site manager’ button (see image below), select ‘hie-storage’ from the left panel and click connect.
