Note: the HIE-Data network path is now actually “HIE-Data2”, it’s a long story.
Windows Instructions
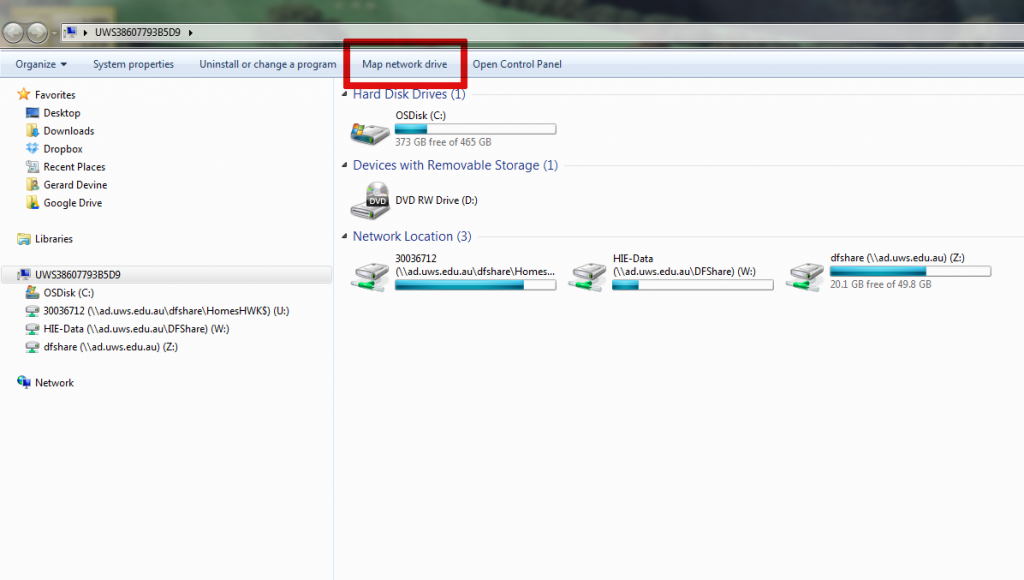
1. Open up ‘My Computer’ on your Windows Desktop/Laptop
2. On the top panel click ‘Map Network Drive’
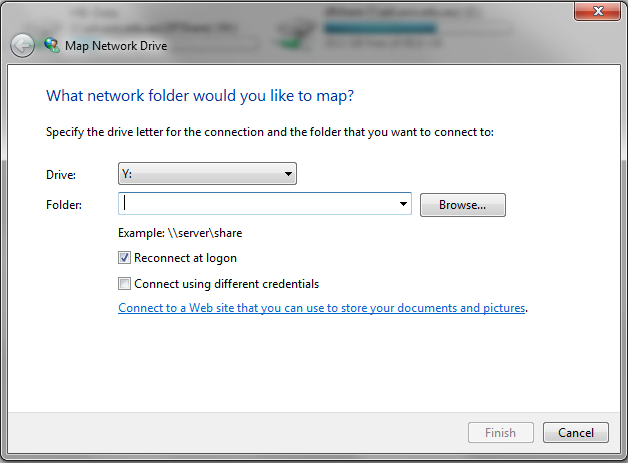
3. In the window that opens change the ‘Drive’ to W: (if it has not been already been assigned to something else, otherwise choose a suitable drive letter). In the ‘Folder’ section, type in the following address:
\\ad.uws.edu.au\dfshare\HIE-Data2
and then press ‘Finish’.
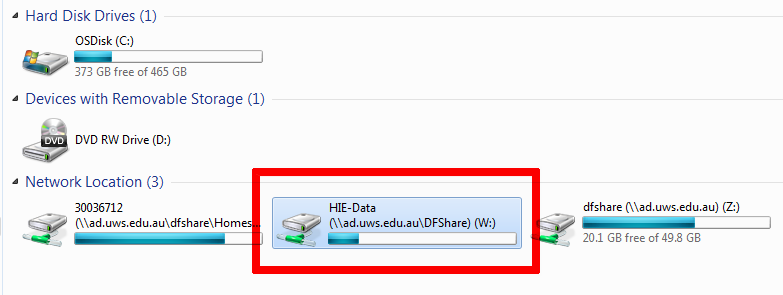
4. At this point you should now have the HIE-Data drive mapped to your desktop (and available under ‘My Computer’) and should be able to use it much like any other Windows folder.
Mac Instructions
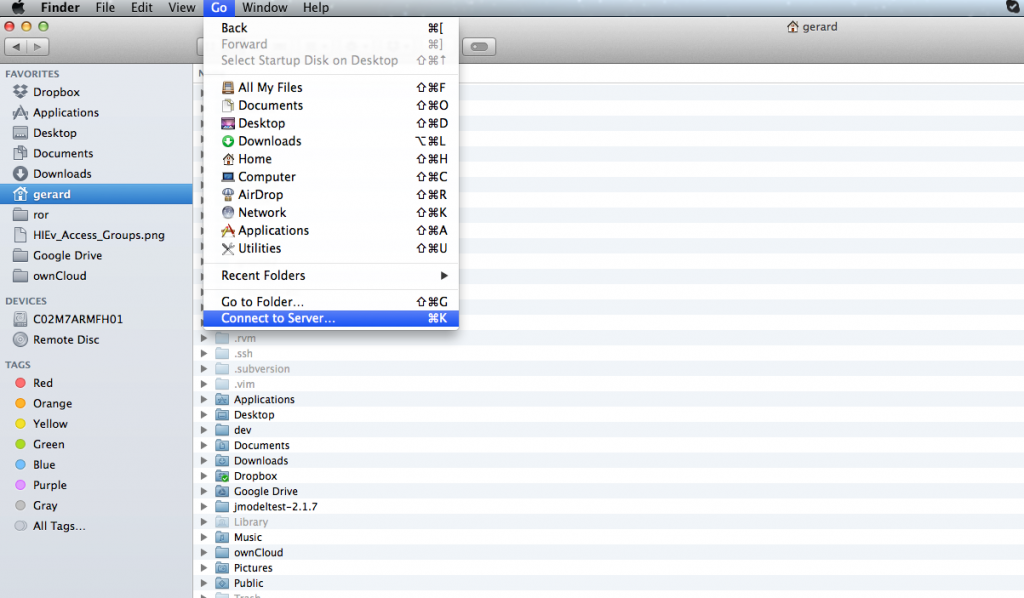
1. Open a new ‘Finder’ window.
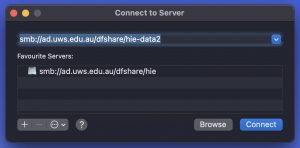
2. On the ‘Go’ menu, click ‘Connect to Server’
3. On the resulting pop-up, enter the following server address and press the ‘+’ button to add it to the list:
smb://ad.uws.edu.au/dfshare/hie-data2
and then click ‘Connect’.
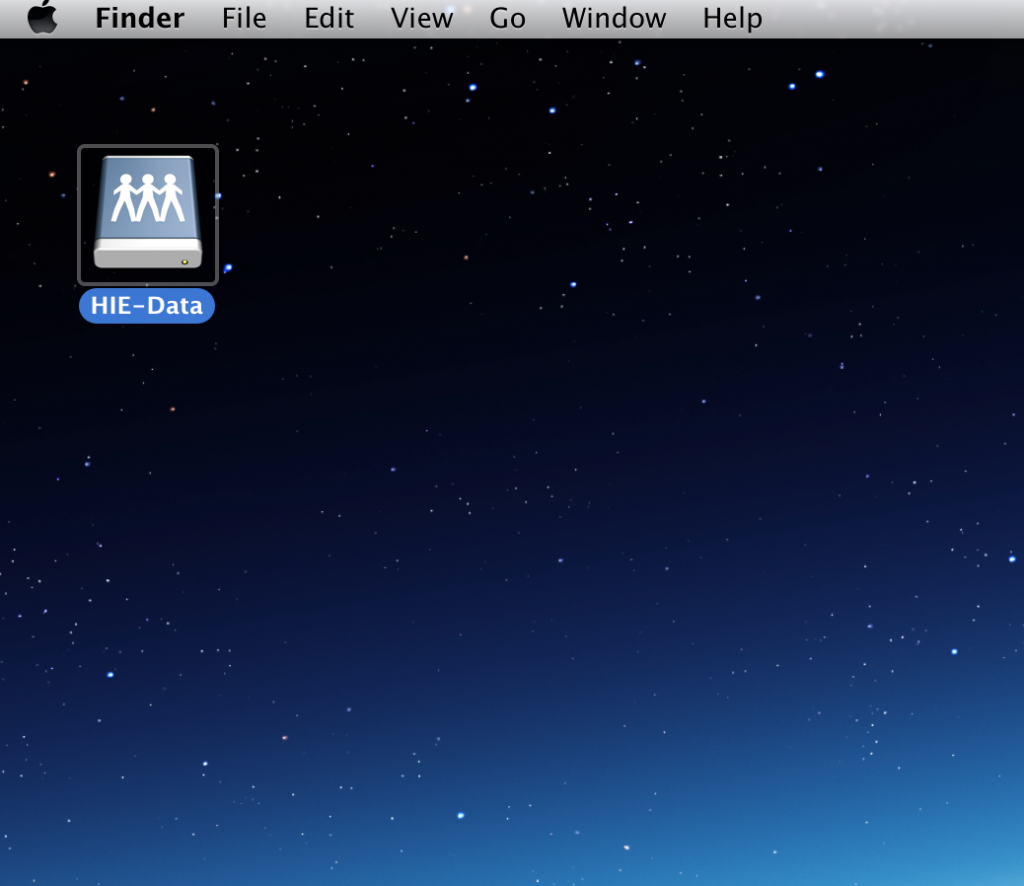
4. On a WSU Managed Mac you may not need to authenticate. But, if you are asked in a popup box, select ‘Registered User’ and then enter your WSU staff ID e.g. 30036712 and then your Western password. Finally click Connect (you can tick the box to ensure your credentials are automatically remembered on subsequent logins). The HIE-Data folder should open on your system and you should be able to navigate to any folders for which you have access rights. A HIE-Data drive icon should appear on your desktop:
5. To maintain a drive on your desktop permanently, right click on the HIE-Data Drive and select ‘Make Alias’. This alias should now appear each time you switch on your computer allowing fast access to your HIE-Data drive.
Extra Notes
* Using W: as the Drive letter is intended to create some consistency across the Institute. It is not compulsory however and you are free to use a different letter if necessary.
* The instructions above map the top level HIE-Data folder to your directly. If you prefer to map directly to a subfolder within, e.g. a project folder within the WorkingData folder, you just need to add the full path to the ‘Folder section’ in step 3 above.
